Sealcoating is a crucial maintenance technique widely recognized for its effectiveness in preserving and enhancing asphalt surfaces. But what is sealcoating, and why is it so important for your pavement, whether it be a driveway, parking lot, or any asphalt surface? This comprehensive guide delves into the nature of sealcoating, exploring its purpose, benefits, and essential considerations for application and maintenance.
From understanding how long after sealcoating you can drive on it to the specifics of asphalt parking lot sealcoating and the impact of rain, we’ll cover all the aspects to help you protect your investment. Whether you’re curious about the types of asphalt sealcoating, sealcoat dry time, or the cost-effectiveness of parking lot sealcoating, this guide provides valuable insights to ensure your pavement remains in top condition for years to come.
Understanding Sealcoating
Sealcoating is not just a routine pavement maintenance service; it’s a vital protection method that significantly enhances the longevity and aesthetics of asphalt surfaces. In this section, we’ll explore the basics of sealcoating, answering the fundamental question: what is sealcoating? We’ll discuss its purpose, delve into its composition, and explain precisely what sealcoating does to protect and beautify your asphalt pavement.
Definition and Purpose
Sealcoating, often referred to in discussions about pavement maintenance, involves applying a protective coating to asphalt-based pavements to extend their lifespan and enhance their appearance. But what exactly does sealcoating do? Essentially, it acts as a barrier against elements that can degrade the asphalt, such as UV rays, rain, and chemicals.

Composition of Sealcoat Materials
Sealcoat materials typically consist of a mixture of emulsified asphalt, water, mineral fillers, and various additives. These ingredients are mixed to create a liquid coating that hardens when exposed to air.
Types of Sealcoating Materials Used
When selecting sealcoating materials, it’s crucial to understand the different types available and their respective advantages and disadvantages. For instance:
- Coal Tar Emulsion: It is durable against fuel spills but can be more harmful to the environment.
- Asphalt Emulsion: It is less odorous and more eco-friendly but may not be as resistant to chemical exposure.

Benefits of Sealcoating
Sealcoating offers a multitude of benefits that extend beyond mere surface appearance. This section highlights how sealcoating enhances curb appeal, protects against environmental damages, reduces maintenance costs, and extends the lifespan of the pavement. Learn about the protective qualities that sealcoating provides against water penetration, weathering, oil, and chemical spills and how it effectively maintains the integrity of your pavement.
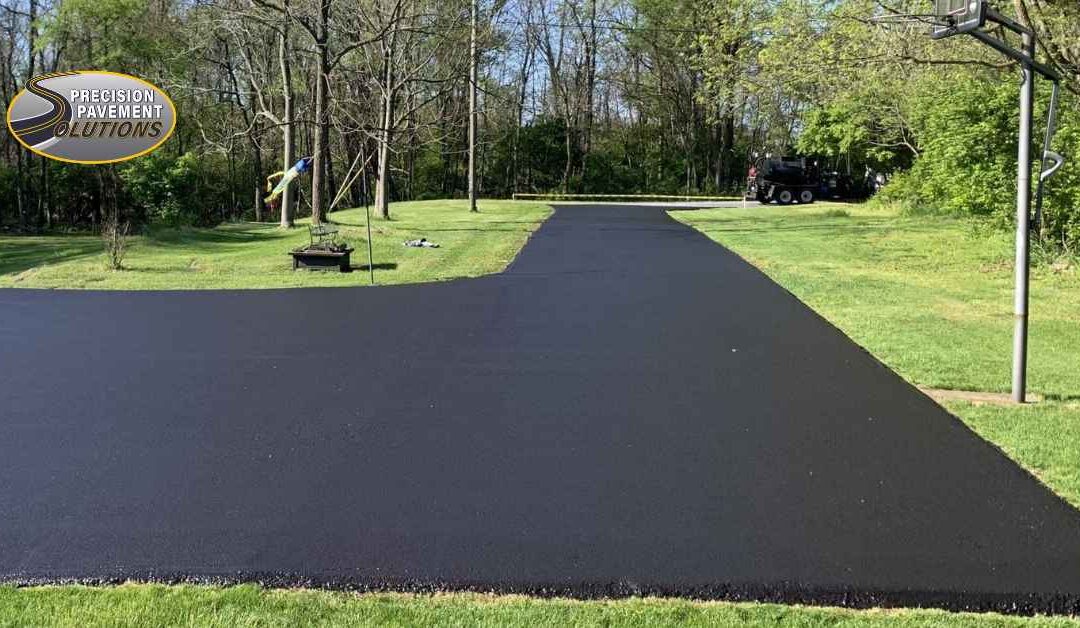
Enhanced Appearance and Curb Appeal
One of the immediate benefits of sealcoating is the fresh, rich black finish it gives, which can significantly improve a property’s curb appeal.
Protection Against Water Penetration and Weathering
Sealcoating helps protect asphalt from the damaging effects of water, ice, and snow. This protection is crucial as water penetration can lead to significant damage like cracks and potholes over time.
Reduced Maintenance Costs and Longer Pavement Lifespan
Does sealcoating extend life? Absolutely. By protecting the pavement from natural and chemical elements, sealcoating reduces the need for frequent repairs, thereby decreasing maintenance costs and prolonging the pavement’s service life.
Resistance to Oil and Chemical Spills
Sealcoating provides a resistant surface that can prevent oil and chemical spills from penetrating the asphalt, which is particularly beneficial in areas such as gas stations and parking lots.
When and How Often to Sealcoat?
The frequency of sealcoating depends on several factors, including traffic volume and weather conditions. Generally, it’s advisable to sealcoat asphalt surfaces every two to three years to maintain optimal protection.
Preparing for Sealcoating
Proper preparation is key to ensuring the success of a sealcoating project. This part of the guide focuses on the necessary steps to prepare your asphalt surface for sealcoating, including thorough inspection and repair, as well as cleaning and priming. We’ll discuss how to set the stage for a seamless sealcoating process that ensures maximum adhesion and effectiveness.
Inspection and Repair
Before sealcoating, inspect the pavement for any damages. Addressing issues like cracks or potholes is crucial, as sealcoating is not meant to repair but to protect.
Cleaning and Priming
Thoroughly cleaning and priming the surface ensures that the sealcoat adheres properly, providing effective and lasting protection.
The Sealcoating Process
Understanding the sealcoating process is essential for anyone looking to protect their asphalt investment. In this section, we delve into the various application methods and the importance of proper technique. Let’s get started:
Application Methods
Sealcoating can be applied using brushes, squeegees, or specialized spray equipment. Each method has its own advantages, and the choice often depends on the area size and the pavement’s specific needs.
Curing and Drying Times
Sealcoat dry time can vary, but typically, traffic should be kept off the new coating for at least 24-48 hours under ideal weather conditions. How long it takes for sealcoating to dry completely may extend up to 72 hours if the weather is less favorable.

Do and Don’t: Maintenance After Sealcoating
Proper maintenance after sealcoating is crucial to ensure that your newly protected pavement remains in excellent condition for as long as possible. Following a set of dos and don’ts can help avoid common pitfalls and maximize the benefits of your sealcoating investment.
Do:
- Allow Adequate Curing Time: How long should you stay off the driveway after sealcoating? It’s vital to give the sealcoat enough time to dry and cure properly. Generally, you should avoid any traffic on the surface for at least 24-48 hours. In cooler or more humid conditions, this might extend to 72 hours.
- Perform Regular Cleaning: Keep the sealed surface clean from debris, dirt, and fluids, which can degrade the sealcoat. Gentle cleaning with a broom or hose is typically sufficient and should be done regularly.
- Monitor for Damages: Inspect the surface periodically for any signs of wear or damage. Early detection can prevent minor issues from becoming major problems.
- Apply Touch-Ups as Needed: Minor touch-ups can often address small areas of wear or damage without the need for a complete reseal.
Don’t:
- Use Harsh Chemicals: Avoid using harsh chemicals and solvents on the sealcoated surface. These can break down the sealcoat and reduce its effectiveness and lifespan. If spills occur, clean them up promptly using manufacturer-recommended cleaning agents.
- Ignore Repairs: Do not delay repairs to any new damage, such as cracks or holes. Leaving them unaddressed can allow water to penetrate beneath the surface, undermining the integrity of both the sealcoat and the asphalt.
- Sealcoat Too Frequently: Applying sealcoat too often can lead to buildup and flaking. It’s important to wait the appropriate amount of time between applications, typically 2-3 years, depending on traffic and weather conditions.
- Forget About Weather Conditions: After sealcoating, keep an eye on the weather. Rain after sealcoating can impair the curing process if it occurs before the sealcoat has dried sufficiently. Planning your sealcoating project during a dry, warm spell can help ensure optimal results.
Common Problems and Solutions
Sealcoating is an effective way to extend life and improve the appearance of asphalt surfaces. Still, it can sometimes be accompanied by issues, particularly when the application process isn’t executed correctly. Understanding common problems and their solutions can ensure that your sealcoating project results in a smooth, durable finish.

Common Problems
- Early Wear: This issue often results from applying a sealcoat too thinly or unevenly. Early wear can also occur if the sealcoating is subjected to heavy traffic before it has fully cured.
- Uneven Coating: Poor technique, inadequate equipment, or uneven application rates can lead to patchy areas. This affects the appearance but also the effectiveness of the sealcoat.
- Poor Adhesion: If sealcoating doesn’t adhere well, it can peel or flake off. This typically happens when the asphalt isn’t cleaned properly before application, leaving dust, debris, or oils that prevent the sealcoat from bonding.
- Bubbling: Sealcoat may form bubbles during the drying process if it’s applied in too hot weather or if moisture is present on the asphalt surface.
Solutions
- Ensure Proper Technique and Conditions: Applying a sealcoat in the right environmental conditions is crucial. Avoid sealcoating in extreme temperatures; the ideal range is generally between 50 and 90 degrees Fahrenheit with low humidity.
- Proper Surface Preparation: Thoroughly clean and dry the pavement before applying a sealcoat. This includes removing all dust, debris, and liquids. Repair any cracks and allow repairs to cure fully before sealcoating.
- Use Quality Materials and Equipment: Invest in high-grade sealcoat and application tools. Professional-grade sealcoats and proper squeegees, brushes, or spray equipment ensure a consistent application that lasts longer.
- Apply the Correct Thickness: Follow the manufacturer’s recommendations on sealcoat thickness and coverage rates. Applying too little material can lead to premature wear, while too much can cause poor curing and performance issues.
- Allow Adequate Drying and Curing Time: Refer to guidelines on how long it takes for sealcoating to dry and adhere to them strictly. Traffic should be kept off the surface for at least 24-48 hours under ideal conditions. Be mindful of the weather; avoid sealcoating when rain is expected shortly after application, as rain after sealcoating can severely affect the quality of the job.
DIY Vs. Professional Sealcoating
When it comes to sealcoating, property owners often face the dilemma of choosing between a DIY project and hiring professional services. Each approach has its advantages and drawbacks, and understanding these can help you make an informed decision that best suits your needs, budget, and the condition of your pavement.
DIY Sealcoating
Pros:
- Cost-Effectiveness: DIY sealcoating can be less expensive upfront. Purchasing your own materials and equipment may save you the labor costs associated with professional services.
- Flexibility: Handling the project yourself allows you to choose the exact timing and pace of the work, fitting it around your schedule.
- Satisfaction: There’s a personal satisfaction and sense of accomplishment that comes with completing home improvement projects on your own.
Cons:
- Quality of Application: Unless you have experience, your application might not be as even or durable as a professional’s work. Mistakes in the application can lead to poor sealcoat performance and might require reapplication sooner.
- Access to Materials and Equipment: Professional-grade sealcoats and equipment are often superior to those available to consumers. Professionals have access to top-quality materials that might not be economically feasible for single-use DIY projects.
- Labor Intensity: Sealcoating is labor-intensive and requires a significant time commitment to prepare and apply correctly, which DIYers might underestimate.
Professional Sealcoating
Pros:
- Expertise and Experience: Professionals bring years of expertise and are skilled in applying sealcoat efficiently and effectively. They are trained to handle a variety of asphalt conditions and choose the appropriate materials and techniques for each situation.
- Durability: A professional job often lasts longer due to better material and application methods. This can make professional sealcoating more cost-effective in the long run.
- Convenience: Hiring a professional sealcoating service means you won’t have to deal with the physical labor or time management of the project. The service provider handles everything from preparation to application and cleanup.

Cons:
- Higher Initial Cost: The primary drawback of hiring professionals is the cost. Professional sealcoating services are more expensive at the outset compared to doing it yourself.
- Scheduling: You will need to work according to the contractor’s schedule, which might not always align with your availability or preferences.
- Making the Decision: When deciding between DIY and professional sealcoating, consider the size and condition of your asphalt surface, your personal experience with similar projects, and your budget. For small areas or if you have previous experience with sealcoating, a DIY approach might be feasible.
However, for larger projects, areas with significant wear, or when longevity and quality are paramount, professional sealcoating is often the better choice.
Closing Remarks
Sealcoating is an essential maintenance procedure that can dramatically extend the lifespan and appearance of asphalt pavements. Whether it’s a small driveway or a large parking lot, understanding the proper techniques and timing can lead to significant long-term savings and improved property value. Remember, a well-maintained pavement reflects on a property’s overall impression.
Sealcoating FAQs
How Long for Sealcoating to Dry?
Sealcoating typically requires about 24 to 48 hours to dry sufficiently. The exact drying time can vary depending on several factors, including temperature, humidity, and the type of sealant used. It’s best to ensure the sealcoated surface has ample time to dry in optimal weather conditions, which generally means warm, dry weather with low humidity.
How Long After Sealcoating Can You Drive on It?
After sealcoating, it is generally recommended to wait at least 24 to 48 hours before driving on the surface. This waiting period allows the sealant to cure properly, ensuring it provides the best protection and longevity. For pedestrian traffic, a shorter wait time of around 4 to 8 hours is usually sufficient.
What Does Sealcoating Do?
Sealcoating provides a protective layer to asphalt surfaces, helping to shield them from the damaging effects of water, oils, and UV rays. This process enhances the appearance of the asphalt, giving it a fresh, black finish. It also fills small surface voids, reducing the potential for water penetration and subsequent damage like cracking and potholes.
Does Sealcoating Extend Life?
Yes, sealcoating significantly extends the life of asphalt surfaces. By providing a protective barrier against elements such as water, oils, and UV radiation, it prevents the underlying asphalt from deteriorating quickly. Regular sealcoating can prolong the lifespan of an asphalt driveway or parking lot, potentially doubling its usable life by reducing the need for costly repairs and maintenance.
Does Sealcoating Fill Cracks?
Sealcoating is not designed to fill large cracks or potholes. However, it can fill very small surface cracks and voids, helping to prevent water from seeping into the base material and causing further damage. For the best results, larger cracks and potholes should be repaired with appropriate crack fillers or patching materials before applying the sealcoat.